What are React Hooks?
Hooks were a new addition added to React 16.8. When using hooks you can get to reuse stateful logic without changing your component's hierarchy. This means that your codebase will be much easier to read, test and maintain.
There are 2 primary rules to notes when using hooks:
- You can only use hooks inside functional components.
- We can only call hooks at the top level of a component's render function - meaning hooks cannot be called conditionally in flow control statements like
ifstatements or loops etc.
For more information, visit: TypeScript + React Hooks: Part 1 - The Basics | Instil
How do you use React Hooks with Redux?
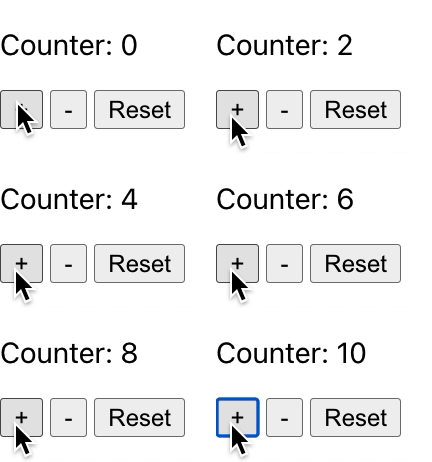
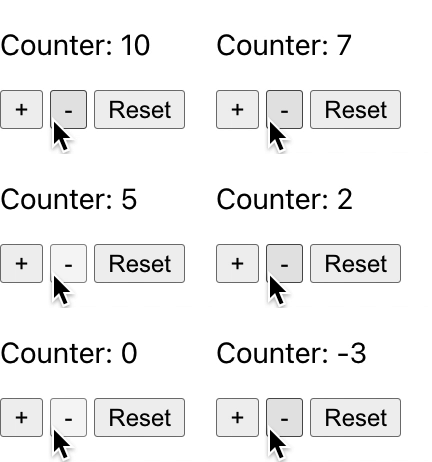
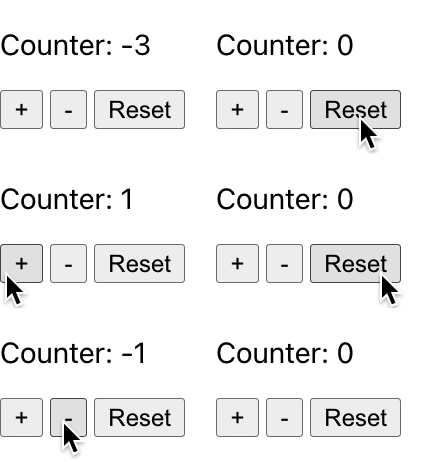
The example we’ll be going over today is simple web application allowing users to change the values of a counter. Application functionality includes incrementing, decrementing and resetting the displayed value on the screen. Some examples of this can be seen below:

Incrementing functionality

Decrementing functionality

Reset functionality
Now let's look at the code:
HooksExample.tsx
import {FC} from "react";
import {connect, MapDispatchToProps, MapStateToProps} from "react-redux";
import {RootState} from "./redux/Store";
import {decreaseValueByAmount, increaseValueByAmount, resetValue} from "./redux/reducers/CounterSlice";
import "./HooksExample.css";

interface StateProps {
  counter: number;
}

interface DispatchProps {
  increaseValueByAmount: (newValue: number) => void;
  decreaseValueByAmount: (newValue: number) => void;
  resetValue: () => void;
}

type Props = StateProps & DispatchProps;

const HooksExample: FC<Props> = ({counter, increaseValueByAmount, decreaseValueByAmount, resetValue}) => {
  return (
    <div>
      <p>Counter: {counter}</p>
      <button onClick={() => increaseValueByAmount(counter + 1)}>+</button>
      <button onClick={() => decreaseValueByAmount(counter - 1)}>-</button>
      <button onClick={() => resetValue()}>Reset</button>
    </div>
  );
};
const mapStateToProps: MapStateToProps<StateProps, {}, RootState> = (state) => ({
  counter: state.counterDetails.counter,
});

const mapDispatchToProps: MapDispatchToProps<DispatchProps, {}> = {
  increaseValueByAmount,
  decreaseValueByAmount,
  resetValue,
};

export default connect(mapStateToProps, mapDispatchToProps)(HooksExample);
Before hooks existed, if you wanted to pass redux state or use a dispatch function you would be required to use the connect function (as seen on the last line). The connect function acts a gateway to the Redux store in which you can store states and dispatch actions to modify the contents of the store.
Before we delve into some example code let's familiarise ourselves with a few important concepts:
mapStateToProps
mapStateToProps: (state, ownProps?) => StateProps;mapStateToProps allows us to load values from the store into our component. Then when the props that we register on are updated, the component will re-render.
As seen in the code above, whenever the counter is modified, the component will re-render and display the updated value to the user.
const mapStateToProps: MapStateToProps<StateProps, {}, RootState> = (state) => ({
  counter: state.counterDetails.counter,
});
mapDispatchToProps
mapDispatchToProps: StateProps | (dispatch, ownProps?) => DispatchPropsmapDispatchToProps provides mapping for dispatch functions which allow us to update the contents of the store.
As seen in the code above, we have the following dispatch functions: increaseValueByAmount, decreaseValueByAmount and resetValue.
These functions reside in the CounterSlice file.
CounterSlice.ts
import {createSlice, PayloadAction} from "@reduxjs/toolkit";

export interface CounterDetails {
  counter: number;
}

const initialState: CounterDetails = {
  counter: 0,
};

const counterSlice = createSlice({
  name: "counterDetails",
  initialState,
  reducers: {
    increaseValueByAmount(state: CounterDetails, action: PayloadAction<number>): void {
      state.counter = action.payload;
    },
    decreaseValueByAmount(state: CounterDetails, action: PayloadAction<number>): void {
      state.counter = action.payload;
    },
    resetValue(state: CounterDetails): void {
      state.counter = initialState.counter;
    },
  },
});

export const {increaseValueByAmount, decreaseValueByAmount, resetValue} = counterSlice.actions;

export const counterReducer = counterSlice.reducer;
For this file, we import the createSlice function from the redux toolkit, which accepts a slice name, an initial state and an object of reducer functions.
The reducer functions, increaseValueByAmount and decreaseValueByAmount, both set the counter to the updated value from the actions payload whilst resetValue, once called, will set the counter to its initial state. Which is 0.
const initialState: CounterDetails = {
  counter: 0,
};
Reverting back to our main component, HooksExample.tsx, there is a lot of boiler plate code to implement.
However, with a bit of refactoring and the use of useSelector and useDispatch hooks we can remove most of the boilerplate code, but first let’s delve deeper into these new hooks.
useSelector()
In short this is the equivalent of using mapStateToProps and will only extract items from the store that we specify. Much like mapStateToProps we assign an item from a store to a variable however we can simplify this much further.
Currently our code, in HooksExample.tsx contains this piece of functionality:
const mapStateToProps: MapStateToProps<StateProps, {}, RootState> = (state) => ({
  counter: state.counterDetails.counter,
});
We can replace this in the render function:
const counterValue = useSelector((state: RootState) => state.counterDetails.counter);However, there is a few things we need to be aware off when utilising the useSelector hook - although it provides similar functionality it does differ from mapStateToProps:
-
The
useSelectorcan return anything as a result, not just an object -
When an action is dispatched, the
useSelectorwill compare the previous selector result with the current one via a strict comparison check (===) to determine if the object is in fact different. If there is a difference then the component will be re-rendered, otherwise no re-render will take place.mapStateToPropson the other hand uses shallow equality checks (which checks if the types are the same - not the contents) to determine if a re-render will occur. You can read more on these checks here.
useDispatch()
This is the substitution for mapDispatchToProps - it only returns a reference to the dispatch function. Its behaviour consistently remains the same as if we assign it to a variable that we can then use throughout the class.
Instead of doing this:
const mapDispatchToProps: MapDispatchToProps<DispatchProps, {}> = {
  increaseValueByAmount,
  decreaseValueByAmount,
  resetValue,
};
We can directly call the reducers in the onClick button using the useDispatch hook. To invoke it we will need to assign it to a constant.
const dispatch = useDispatch();Then wherever we want to update the states in the store we can specify an action as an argument.
<button onClick={() => dispatch(increaseValueByAmount(counterValue + 1))}>+</button>
<button onClick={() => dispatch(decreaseValueByAmount(counterValue - 1))}>-</button>
<button onClick={() => dispatch(resetValue())}>Reset</button>
You can find more information about useSelector and useDispatch from the react redux website.
Utilising this knowledge, we can refactor the above code as follows:
import {FC} from "react";
import {useDispatch, useSelector} from "react-redux";
import {RootState} from "./redux/Store";
import "./HooksExample.css";
import {increaseValueByAmount, decreaseValueByAmount, resetValue} from "./redux/reducers/CounterSlice";

const HooksExample: FC = () => {
  const counterValue = useSelector((state: RootState) => state.counterDetails.counter);
  const dispatch = useDispatch();

  return (
    <div>
      <p>Counter: {counterValue}</p>
      <button onClick={() => dispatch(increaseValueByAmount(counterValue + 1))}>+</button>
      <button onClick={() => dispatch(decreaseValueByAmount(counterValue - 1))}>-</button>
      <button onClick={() => dispatch(resetValue())}>Reset</button>
    </div>
  );
};

export default HooksExample;
Introducing the useDispatch and useSelector hooks has simplified the code, and made it easier to read and maintain.
We also no longer require the connect() call since our newly added hooks can handle the connection to the Redux Store.
Some cons to using hooks
When we move away from connect() we sacrifice some performance benefits it provides:
- We lose the automatic referential caching that
connect()provides. - We lose access to the
ownPropswithinmapStateToProps. To get theownPropsobject we will need to write our own logic/hook.
On the other hand, using hooks:
- We get the same result as using
connect()but with using fewer lines of code - meaning code is easier to read, test & maintain. - Allows us to decouple/encapsulate stateful logic without affecting the hierarchy of components - making it easier to reuse logic in other parts of our codebase.
More information on using React Hooks with Redux can be also be found here.