
React Tutorial - Build a Weather App from Scratch - Part 1
In this tutorial I'll take you step-by-step through creating a weather app using React and TypeScript.
This tutorial provides a complete introduction to using React and TypeScript to build a client-side web app. We'll create a simple Weather App that allows you to search for locations and displays its current weather and 24 hour forecast. Along the way, you'll learn:
- Boot-strapping an app with
create-react-app - Using React with TypeScript
- React Hooks
- Async Communication to the Open Weather API
- Basic Styling
You can find the code on GitHub. The tutorial is broken up into 6 steps spread over 2 blog posts and the code repository contains the end result of each step in its own folder for easy comparison.
If you want to a good introduction to React, then follow along and try to implement this app for yourself. Also check out what we cover in our full React course.
Requirements
- NodeJS
- An editor
- Basic familiarity with using the terminal
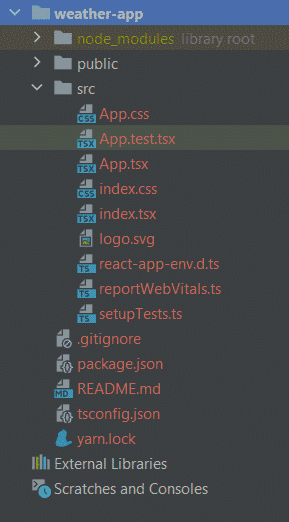
Step 1: Boot-strapping an App with create-react-app
create-react-app is a tool for creating a React project that hides a lot of the complexity of modern JS/TS build systems. You install it using npm:
npm install -g create-react-app
You can then create a React project. This next command will create a new folder for our project so run this in the location you want the project to live. Since we are going to use TypeScript we can specify this template:
create-react-app weather-app --template typescript
cd weather-app
This will create the project folder and perform an npm install (or yarn if it detects that it's installed).
Inside package.json
Looking inside package.json you will notice that the project has only a few dependencies and also some useful scripts for starting, building and testing the project. The scripts make use of react-scripts which is designed to hide the complexity of what is really going on under the hood.
{
  ...
  "scripts": {
    "start": "react-scripts start",
    "build": "react-scripts build",
    "test": "react-scripts test",
    "eject": "react-scripts eject"
  },
  ...
}
We actually have 100s of dependencies and the build system is very complex but this is all hidden behind react-scripts. We can start the development server by running:
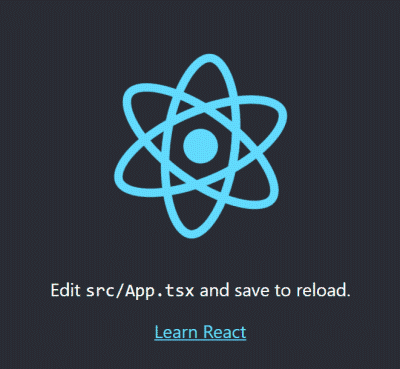
npm start
This should open the browser and start to show your app that is running on http://locahost:3000:
Important Files and Folders
package.json- The definition of our dependencies and build scripts.tsconfig.json- TypeScript compiler settings and configuration.public- This contains any static assets such as images, icons etc. It also includes the first page,index.html.- Some resources such as CSS, fonts and images can be imported directly in code.
public/index.html- The HTML entry point or starting page for your app.- Note, with React we define our content in code and the framework will handle rendering.
- So we don't need to modify this file under normal circumstances.
- At build time a script import line is added to this file and it is the running code that updates the view in memory.
src/index.tsx- The entry point for our executable code.- This is where we kick off a React rendering process for our app.
- This is imported at the bottom of our
index.htmlat build time. When the page loads it is executed. - React modifies the in memory Document Object Model so the page content changes even though
index.htmlremains almost empty.
import React from "react";
import ReactDOM from "react-dom";
import App from "./App";

ReactDOM.render(
  <React.StrictMode>
    <App />
  </React.StrictMode>,
  document.getElementById("root"),
);src/App.tsx- An example of a React component. This one is being used as the root of our app in theindex.tsxcode above.
import React from "react";
import logo from "./logo.svg";
import "./App.css";

function App() {
  return (
    <div className="App">
      <header className="App-header">
        <img
          src={logo}
          className="App-logo"
          alt="logo"
        />
        <p>
          Edit <code>src/App.tsx</code> and save to reload.
        </p>
        ...
      </header>
    </div>
  );
}

export default App;
You can see that React components can be written as simple functions that return some view. We call them “functional components”. You can write your components as classes, but functions are preferred. The view is written using JSX (hence the tsx extension rather than ts). JSX is a syntax extension for JavaScript/TypeScript that allows you to write HTML like tags directly in code. This is trivially transformed into object creation at build time and you can use them anywhere an expression is required (assignments, returns, function calls etc). You could create the objects directly but JSX is neater and more intuitive for building out nested view structures.
There are some differences between HTML and JSX so that we don't get conflicts with normal JS/TS code when it is translated. For example, the class attribute is called className and we use camel-case rather than kebab-case.
As long as the function begins with a capital letter (Pascal Case) you can then use it as a component/tag in other JSX, such as in index.tsx:
ReactDOM.render(
  <React.StrictMode>
    <App />
  </React.StrictMode>,
  document.getElementById("root"),
);
You'll also notice that we're importing a CSS file and SVG image directly in code. This is not standard JS/TS but react-scripts is pulling in Webpack plugins that support this.
Our development server has hot-reload so we can strip our app right back and see it update live:
- Remove the contents of
App.cssandindex.css - Remove the import of
logo.svgfromApp.tsx - Delete
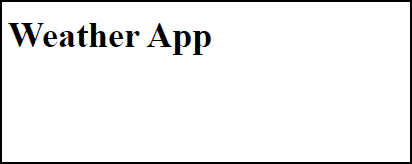
App.test.tsxandlogo.svg - Replace the definition of the App function (component) with:
function App() {
  return (
    <div>
      <h1>Weather App</h1>
    </div>
  );
}
If everything has worked, when you save, the browser will have automatically refreshed and show:
Step 2 - Show a Table of Locations
Let's add an input where a user can search for a location, and add that location to a table. To start with, the location is going to be a string, and the list of all locations in the table, a string array.
Build out the view by replacing the App component with:
function App() {
  return (
    <div>
      <h1>Weather App</h1>
      <div>
        <label>
          Add Location{" "}
          <input
            type="text"
            value="Paris"
          />
        </label>
        <button>Search</button>
      </div>

      <div>
        <h2>Locations</h2>
        <table>
          <thead>
            <tr>
              <th>Name</th>
            </tr>
          </thead>
          <tbody>
            <tr>
              <td>Belfast</td>
            </tr>
            <tr>
              <td>New York</td>
            </tr>
          </tbody>
        </table>
      </div>
    </div>
  );
}
As you can see, this is simply building out a view in the same way we would with HTML. When you save the app should look like:
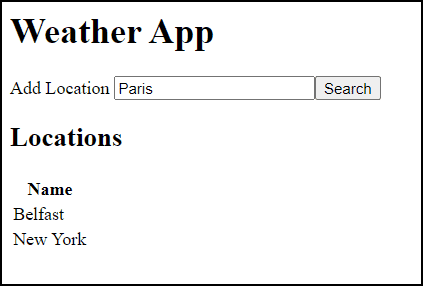
Notice, however, that typing in the input box does not work. This is because we have specified the value of the box as the constant 'Paris' and React is controlling the rendering of the view, including the contents of the box.
Introducing State
So we need to introduce some State to represent the contents of the input. State is data that is bound to the view - only when state changes will React rerender and update the view. State is the source of truth in your React apps.
We introduce state in functional components using the useState hook. Check out Ross Jenkins' great intro to React Hooks. Hooks have to go at the beginning of a function and the useState hook returns a tuple containing the current value of the state and a function to update the state which we can destructure in one line:
import React, {useState} from 'react';
// ...
function App() {
  const [locationSearch, setLocationSearch] = useState('Paris');
  // ...
'Paris' is the initial value and the types are inferred. There are no identifiers or names to identify particular pieces of state, the constant order of calls is how the state is identified. That is why hooks go at the start of the function and can't be inside any control flow such as if.
Next we need to include the value locationSearch into our JSX. We can embed expressions in JSX using {}:
<label>
  Add Location{" "}
  <input
    type="text"
    value={locationSearch}
  />
</label>
Notice that the value attribute assignment does not use quotes. When assigning attributes with expressions in React we always use attribute={expression}, not attribute="{expression}".
Finally, we need to add an onChange handler (note the camel-case) to call the setLocationSearch function whenever the control changes. Again, we use {} to supply an arrow function expression:
<input
  type="text"
  value={locationSearch}
  onChange={(e) => setLocationSearch(e.target.value)}
/>
So when the change handler fires the state will be set, which in turn triggers a rerender.
Mapping Rows in a Table
Let's continue and add some state for the rows of the table.
function App() {
  const [locationSearch, setLocationSearch] = useState('Paris');
  const [locations, setLocations] = useState(['Belfast', 'Dublin']);
To map this into the view we need to have a tr row for every entry in the array, so we literally do a map:
function App() {
  const [locationSearch, setLocationSearch] = useState('Paris');
  const [locations, setLocations] = useState(['Belfast', 'Dublin']);

  return (
    ...
    <table>
      <thead>
      <tr>
        <th>Name</th>
      </tr>
      </thead>
      <tbody>
      {locations.map(location =>
        <tr><td>{location}</td></tr>
      )}
      </tbody>
    </table>
    ...
  );
}
Note how within the map arrow function we can return nested JSX, and that JSX can in turn embed a nested {} expression.
<tbody>
  {locations.map((location) => (
    <tr>
      <td>{location}</td>
    </tr>
  ))}
</tbody>
This interleaving of code and view is very useful. We still need to make one final change. With lists of elements React wants a unique key for each entry so that it can efficiently perform change tracking. Later we will use the location id, but for now we can simply use the index within the table:
<tbody>
  {locations.map((location, index) => (
    <tr key={index}>
      <td>{location}</td>
    </tr>
  ))}
</tbody>
If everything has worked then the view should now look like it did with static content:
Adding a Location
To support adding a location we need to trigger an action when the search button is clicked. This is similar to the input handler but instead of an onChange event we now handle an onClick event. Note that we modify the locations array by setting a completely new state value, not by mutating. This is easy using the spread operator. We also use the locationSearch as the data to add, NOT the input control. In React, state is the source of truth.
<button onClick={() => setLocations([locationSearch, ...locations])}>Search</button>Let's tidy the code up a bit further:
- Break the handler out as a local
const - Disable the button if
locationSearchis blank - Set the search text to blank after searching
const disableSearch = locationSearch.trim() === '';
const addLocation = () => {
  setLocations([locationSearch, ...locations]);
  setLocationSearch('');
};

return (
    ...
    <button onClick={addLocation} disabled={disableSearch}>Search</button>
Further Tidying Up
We can remove the initial dummy data from our useState hooks.
function App() {
  const [locationSearch, setLocationSearch] = useState('');
  const [locations, setLocations] = useState<string[]>([]);
Note that for the locations state the type of the initial data, an empty array, cannot be inferred so we explicitly specify the generic parameter, string[]. For the locationSearch it is automatically inferred as string.
Let's also add Bootstrap for some basic styling. First, add the package to our project,
npm install --save bootstrap
Next, import the CSS - we can do this directly in code in index.tsx since react-scripts supports this.
import "bootstrap/dist/css/bootstrap.min.css";Now we can make use of Bootstrap's classes on our UI elements. Note the use of className instead of class.
function App() {
  ...
  return (
    <div className="container">
      <h1>Weather App</h1>
      <div>
        <label>
          Add Location
          <input className="ml-1 mr-1" type="text" value={locationSearch}
                 onChange={e => setLocationSearch(e.target.value)}/>
        </label>
        <button className="btn btn-primary"
                onClick={addLocation} disabled={disableSearch}>Search</button>
      </div>

      <div>
        <h2>Locations</h2>
        <table className="table table-hover">
        ...
}
The app immediately looks better.
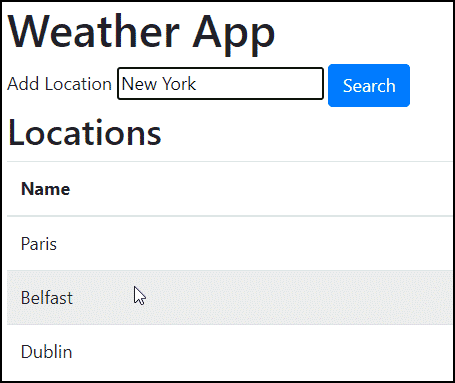
Step 3: Breaking out Components
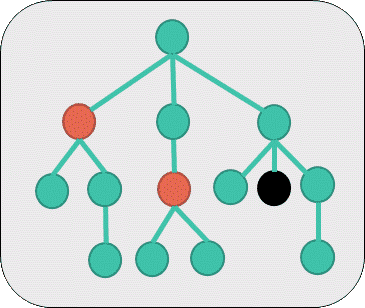
Our app currently only has a single component, App. Let's break the search and table out into their own components. This is common practice for building large UIs where we structure the application as a tree of components:
Location Search Component
We've already seen with App that components can be written simply as functions. We just need to remember that the name must begin with a capital letter. We'll also typically create these in their own file.
Let's begin with a LocationSearch component by creating a file called LocationSearch.tsx and placing the following code inside it:
import React from "react";
import {FC, useState} from "react";

export const LocationSearch: FC = () => {
  return (
    <div>
      <label>
        Add Location
        <input
          className="ml-1 mr-1"
          type="text"
          value={locationSearch}
          onChange={(e) => setLocationSearch(e.target.value)}
        />
      </label>
      <button
        className="btn btn-primary"
        onClick={addLocation}
        disabled={disableSearch}
      >
        Search
      </button>
    </div>
  );
};
Here I've basically cut and pasted this search part of the view out of the App.tsx file. I've added the type FC to the arrow function to strongly type my definition - this is a React type specifying a functional component.
Note I've also imported React on the first line. Prior to React 17 this line was required in all files that use JSX. This is due to the fact that tags were ultimately converted to calls to React.createElement. In React 17 this transform has changed and this import is not required.
Next I have to think about my state - should the locationSearch string state belong to App or LocationSearch? In this case, the input text is transient and I am happy to move it into this new component.
export const LocationSearch: FC = () => {
  const [locationSearch, setLocationSearch] = useState('');
  const disableSearch = locationSearch.trim() === '';
  ...
The onClick handler, however, modifies the locations state. I don't want to the locations state in this control as other parts of my app will use it too so instead I will leave that state in App. I have to communicate from this child component back up to the App whenever the search button has been clicked - we do this by defining a callback prop.
Adding Props to Components
A prop is an input to a component specified as an attribute in JSX. For example:
<LocationSearch prop1={...} prop2={...}/>All props are grouped into an object that is passed to our functional component as a parameter. We can think of state as belonging to the component and is read write. Props are readonly and don't belong to the component, they are passed in. By passing in functions as callback props we can attach event handlers - in this case the handler for onSearch.
In TypeScript we create an interface for all props and specify it as the generic parameter of FC:
interface LocationSearchProps {
  onSearch: (search: string) => void;
}

export const LocationSearch: FC<LocationSearchProps> = (props) => {
Note that the callback takes a string rather than a click MouseEvent parameter. This is another useful thing about having components, we can hide low level details and build cleaner interfaces.
By specifying the generic parameter on FC, the props function parameter will be correctly typed. We can directly destructure within the parameter list and consume onSearch.
export const LocationSearch: FC<LocationSearchProps> = (props) => {};to
export const LocationSearch: FC<LocationSearchProps> = ({onSearch}) => {};Now that we have our callback prop coming into our component we can invoke it when the search button is clicked.
export const LocationSearch: FC<LocationSearchProps> = ({onSearch}) => {
  const [locationSearch, setLocationSearch] = useState('');
  const disableSearch = locationSearch.trim() === '';

  const addLocation = () => {
    onSearch(locationSearch); // Prop callback invoked - string passed
    setLocationSearch('');
  };

  return (
    ...
      <button className="btn btn-primary"
              onClick={addLocation} disabled={disableSearch}>Search</button>
    ...
  );
}
Finally, we can update App.tsx to use this new component:
...
import {LocationSearch} from "./LocationSearch";

function App() {
  const [locations, setLocations] = useState<string[]>([]);
  const addLocation = (location: string) => setLocations([location, ...locations]);

  return (
    <div className="container">
      <h1>Weather App</h1>

      <LocationSearch onSearch={addLocation}/>

      <div>
        <h2>Locations</h2>
        <table className="table table-hover">
      ...
Location Table Component
For the table component, it is a similar process.
- Create a file called
LocationTable.tsx - Move the table view from
App.tsxinto a new component in the file - Add an interface for the props - in this case the locations to display
LocationTable.tsx
import React, {FC} from "react";

interface LocationTableProps {
  locations: string[];
}

export const LocationTable: FC<LocationTableProps> = ({locations}) => (
  <div>
    <h2>Locations</h2>
    <table className="table table-hover">
      <thead>
        <tr>
          <th>Name</th>
        </tr>
      </thead>
      <tbody>
        {locations.map((location, index) => (
          <tr key={index}>
            <td>{location}</td>
          </tr>
        ))}
      </tbody>
    </table>
  </div>
);
App.tsx can then be updated to consume this new component:
App.tsx
...
import {LocationSearch} from "./LocationSearch";
import {LocationTable} from "./LocationTable";

function App() {
  ...
  return (
    <div className="container">
      <h1>Weather App</h1>
      <LocationSearch onSearch={addLocation}/>
      <LocationTable locations={locations}/>
    </div>
  );
}
Next Steps
At this point we have accomplished a lot,
- Bootstrapped a React project from scratch
- Learned the fundamentals of React
- Components
- State and Props
- Binding values
- Basic hooks
- Adding event handlers
- Utilised TypeScript for safety
In Part 2 we'll build on this to:
- Integrate a real weather service
- Use asynchronous communication
- Apply more hooks
Be sure to come back and check out Part 2. You might also be interested in our full React course where you'd learn everything we're covering in this tutorial and lots more besides:
- Using JavaScript or TypeScript
- Redux
- Hooks vs Classes
- Advanced Styling
- Routing
- Lazy Loading
- Testing
- and more
Since we write and deliver all our own material we're happy to customise each delivery to a team's particular requirements and experience level. Come and check us out and our many other courses, and see if we can create a bespoke delivery for you and your team.